Building a Muzzle Loader from Kit
page two of five
If you've ever wanted to build a muzzleloader, flintlock or black powder rifle from a kit, this is for you. With complete instructions from start to finish for muzzleloader rifle kit assembly. This page is photograph intensive and may take several minutes to completely load.
Fashioning the Cheek Piece
Properly fashioning the cheek piece may seem an awesome task. It is not. It is
important though to know what you want it to be before working it. Some
initial patience will increase confidence and help speed the result.
Power tools should not be used here. Dremel tools should be kept from
temptation and only hand fashioning using sand papers and some filing on the
comb drops should be employed.
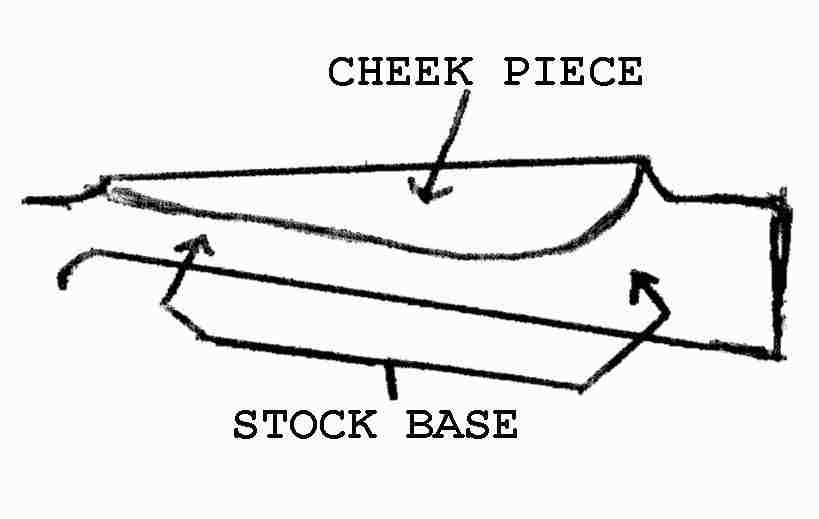
Using medium to light heavy grit paper (say 180 to 120), I usually like to
first knock the machine marks of the face of the cheek piece and then off its'
drop and the surrounding stock base it drops to. This gives a better look at
what there is to work with and displays the form in which the machine cut it
to. I will smooth the face to medium grit but leave it high until all the drop
and contour are fashioned, after which the face can be cut down to suit me. By
leaving it high now I have extra wood to correct mistakes made during course
fashioning.
Know how you want the lines to run before cutting much wood. If you're not sure
look at other rifles that you like, pictures, whatever helps. Keep your design
functional. That is the real purpose of a cheek piece. If you strive for
functionality it will turn out attractive.
If you want
flutes
at the front comb, do not let the drop line run into it.
Regardless of your general design, keep the face edge curvacious. The edge
should curve from back to front with no interruption, such as a small flat on
the edge.
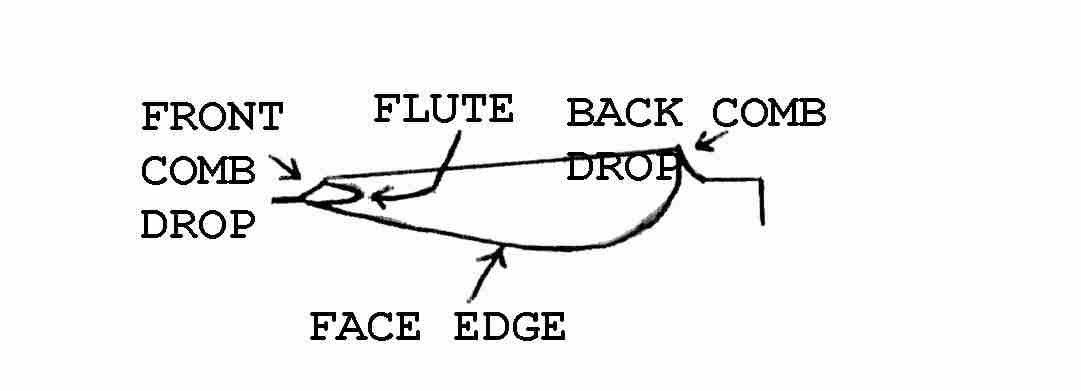
Cheek Piece Side View of Right Handed Stock
Once I've got in my mind how I want the edge to run, I will start somewhere
at the middle and begin cutting it back with a
sanding block
. Sometimes
very careful
filing may be necessary. It depends on how rough the blank was machined, how
far off the lines are (from what I want them to be) and how much wood there is
to work with. Take special care not to cut too deeply into the stock base,
especially were the cheek piece falls close to the base of stock (approaching
and at area of pistol grip). Cut only a surface line until the line is
complete from back to front comb drop. This will ensure plenty of wood will be
left for the drop from face edge to stock base. The front must be cut very
carefully since there will be almost no drop at this area. Do not forget to
leave space for the flute (if wanted).
Dropping the cheek piece requires special care and attention to detail. After
coarsely shaping cheek piece and drop, use fine grit paper to slowly shape the
drop from sharp edge of face to stock base. Finish sand with 400, then 600 grit
paper. The drop at front (closest to pistol grip) is very shallow and requires
great attention in properly removing coarser sanding marks without removing too
much mass. The sharp edge of the cheek piece will likely be compromised by
sanding the drop. If so, correct it by block sanding the cheek face back
into shape. Finish the piece with its edge crisp back to front.
The face edge of the cheek piece should smoothly curve (drop) to the stock
body. The
steepness of drop can be less than shown below but should not recess under
the cheek piece itself. Keep the arc
consistent
from back
(closest to butt) to front (closest to pistol grip). If the cheek piece rolls
over to the other side of stock (a 'rollover' stock), arc the drop the same as
the face side.
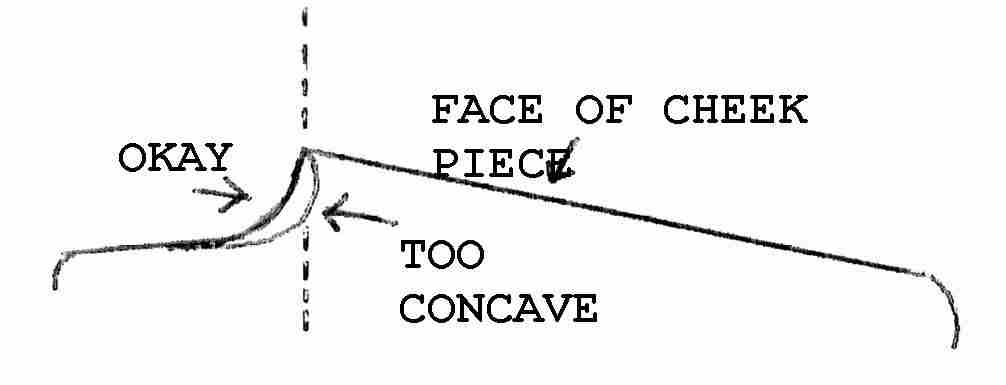
Cross Section of Stock Butt (Right Handed)
Unlike the example above, the face of this cheek piece follows the general
contour of the stock and gives a more elegant appearance and more functional
fit to the face of the shooter.
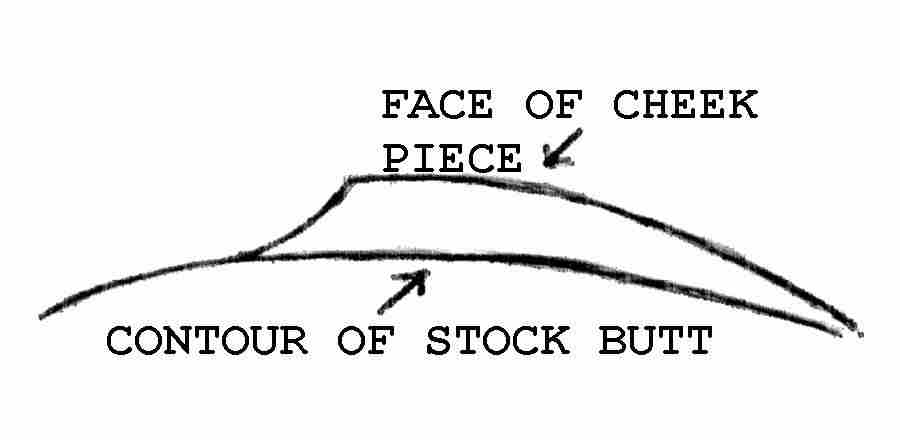
Cross Section of Stock Butt (Right Handed)
There are many cheek piece designs. The first two crude sketches above try to
display a 'monte carlo' pattern, the modern day popular. Some patterns, such
as old and new classic, have no raised comb. Some pieces are oval in shape -
called 'pancake'. All can have a 'shadow line' if cut that way by the vendor
and you or just by you. If your wood came out of a vendor's machine it was
hacked out to replicate a particular design for a particular model of barreled
action. The cheek piece in rough will vaguely or closely resemble the lines you
wished to have when you ordered the stock.
Shadow Line Cheek Piece

Shadow Line bottom view
Shadow line is perpendicular to surface of stock and slight in proportional
height.
A shadow line enhances the sculpture of the cheek piece. It is found not too
often and is pricey in appearance. Much patience is required because of the
close work involved in getting it right. Taking the time and going slow will
prove you can do it. However, I would not recommend this task for one who has
not yet shaped and finished a minimum of one rifle stock.
Thickness of shadow line remains relative to thickness (height) of arc drop
from considerably rear of center to forward, were it eventually disappears as
does the arc drop. To the rear, however, the line must also tapper so that it
disappears at the top of stock comb. Therefore, on stocks with raised combs
(monte carlo, etc.), were the arc becomes thicker as it moves rearward, the
shadow line becomes thiner and is no longer proportional to the thickness of
drop of arc.
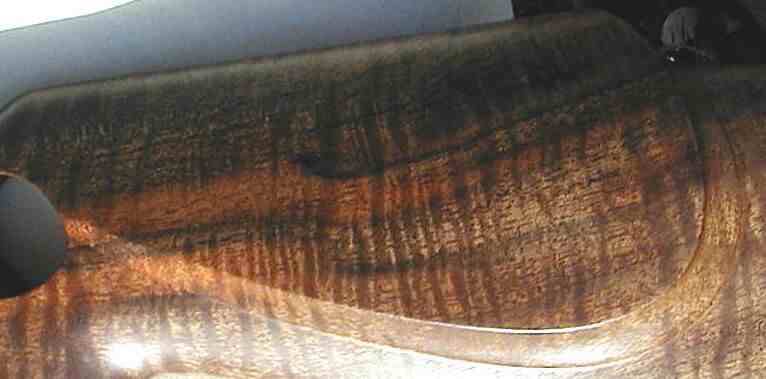
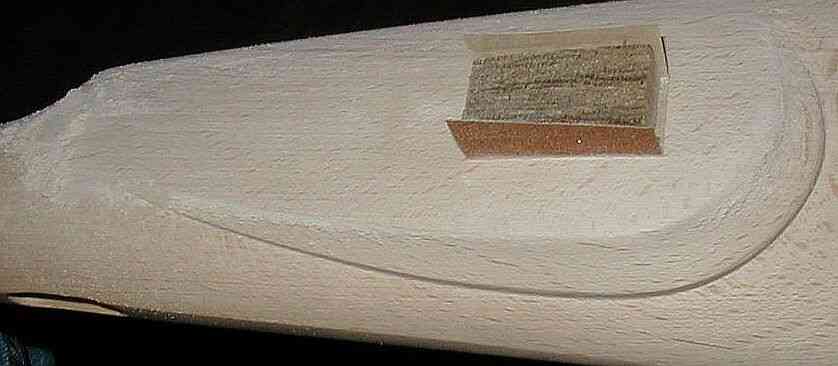
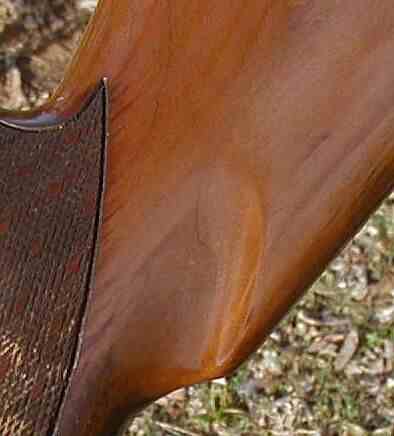
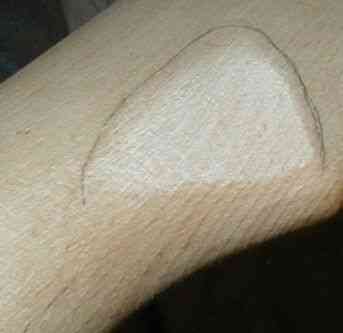
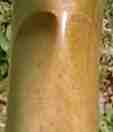
This is the cheek piece before working it. There is plenty of wood rear and below the piece but is shallow at top and front. I studied along time on how I wanted to fashion it. Finally deciding on a shadow line on what I will call a 3/4 cheek piece.
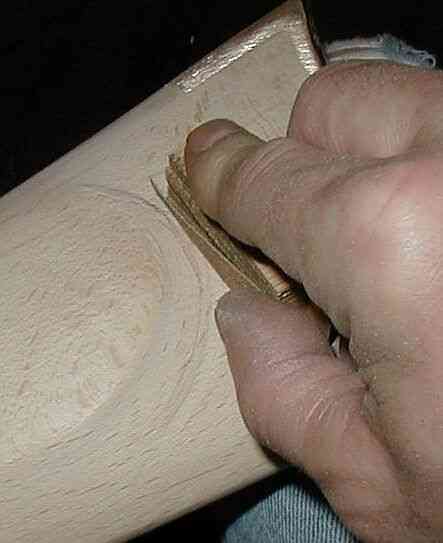
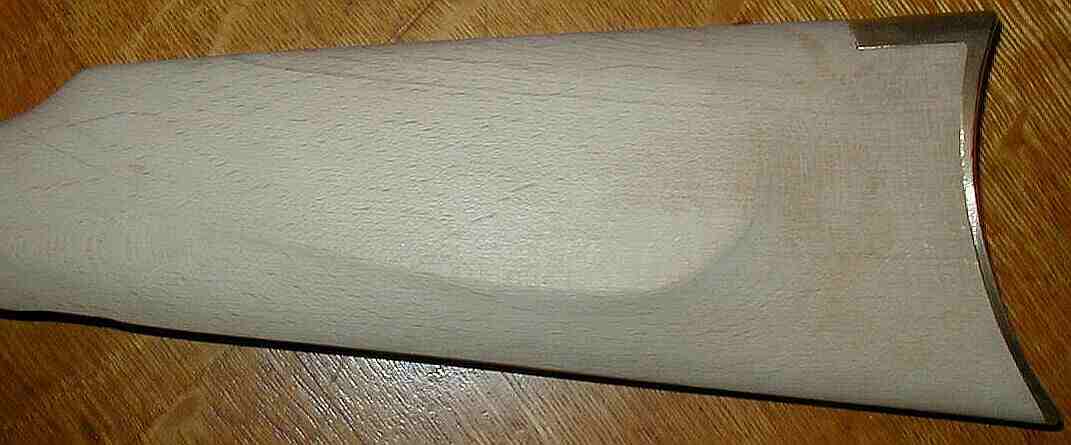
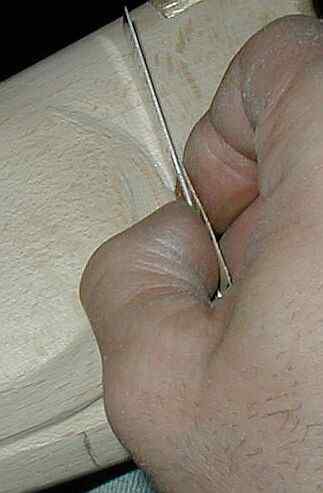
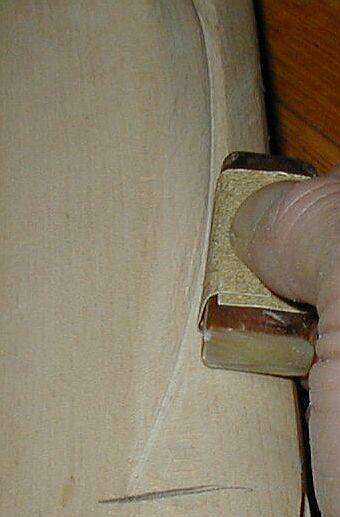
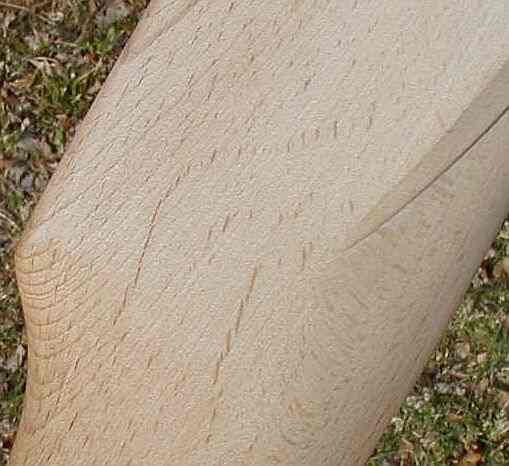
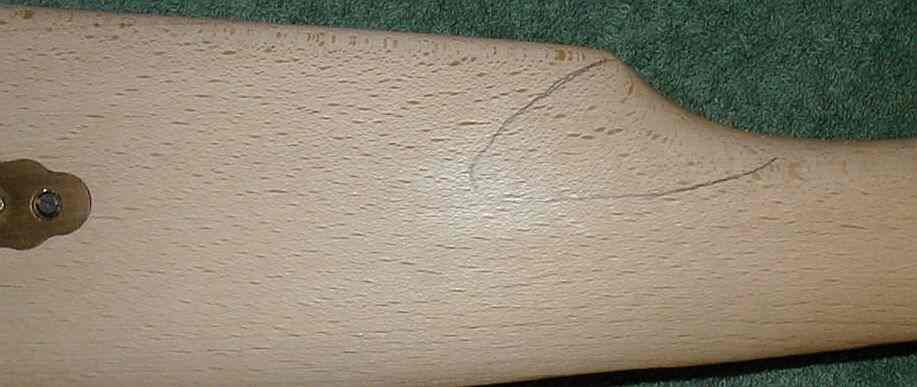
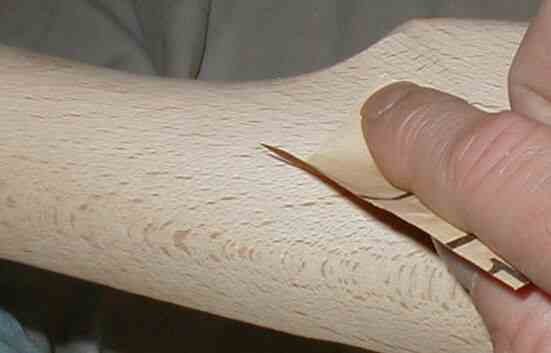
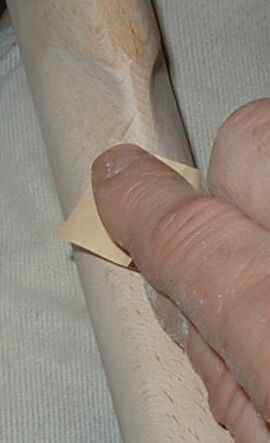
The shadow line is started by cutting it with a sanding block. Following the outside of a pencil mark, the block is used to cut into the wood that slopes away from the cheek face. The cut is made perpendicular to what will become the flat face of the butt of the stock. 100 and 120 grit paper is used.
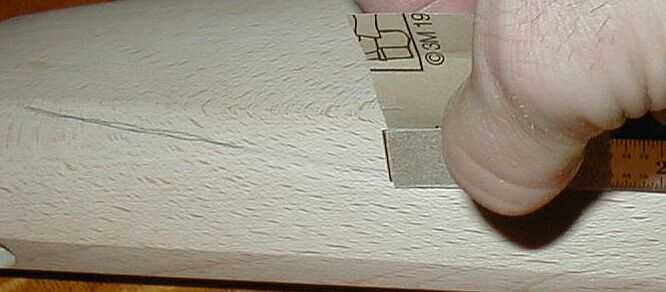
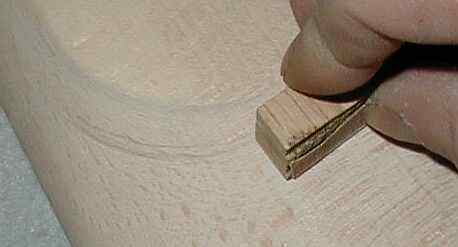
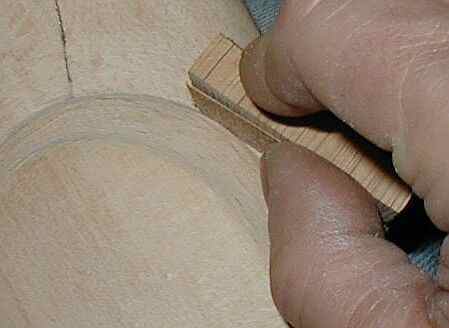
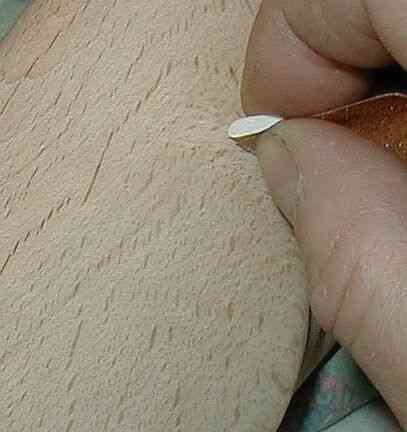
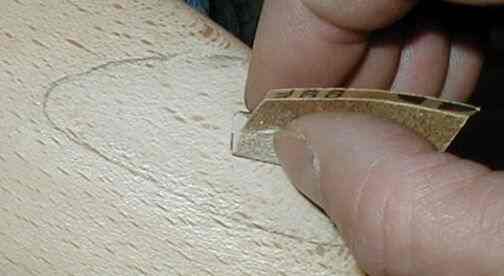
Working forward the slope becomes too steep to control the cut well enough with the wooden sanding block. Here a steel measuring scale is used with 100 or 120 grit paper to start the cut. After a small ledge has been cut using the scale the block is used to deepen the cut.
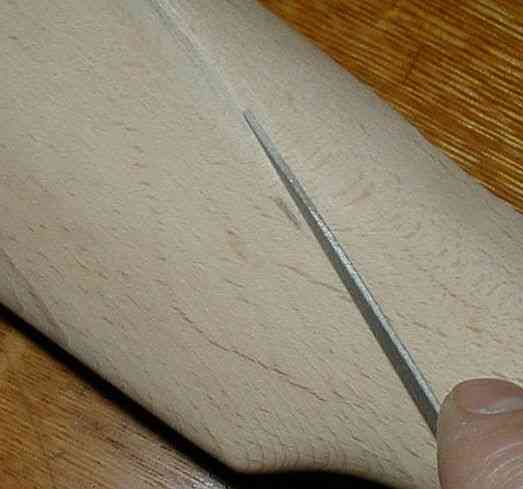
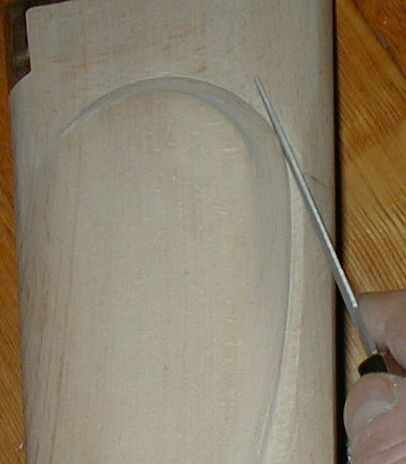
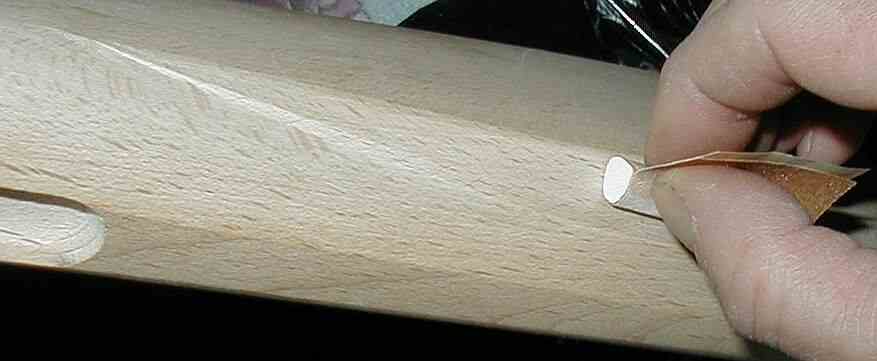
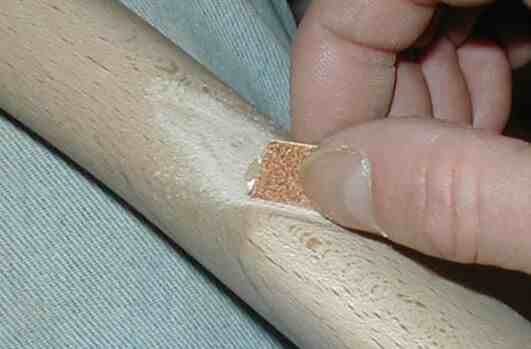
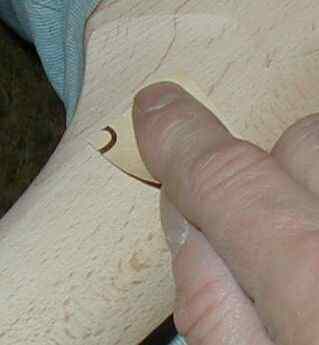
At the extreme front and rear, where the shadow line will taper to the face of the stock, a small pointed file is used to cut the line.
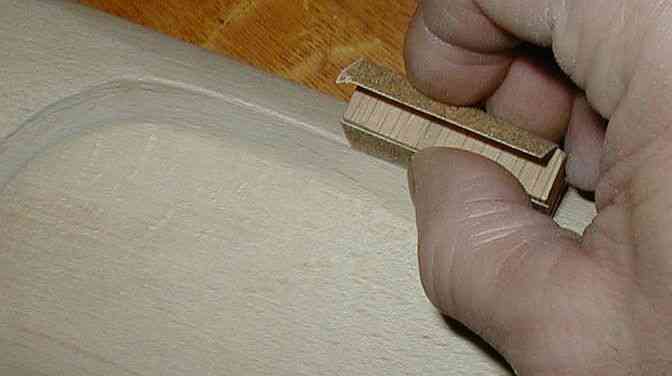
After the shadow line is cut almost as deep as it will be the scale, file and sanding block are used to square up the face of the shadow line and properly curve the line around the face of the cheek piece.
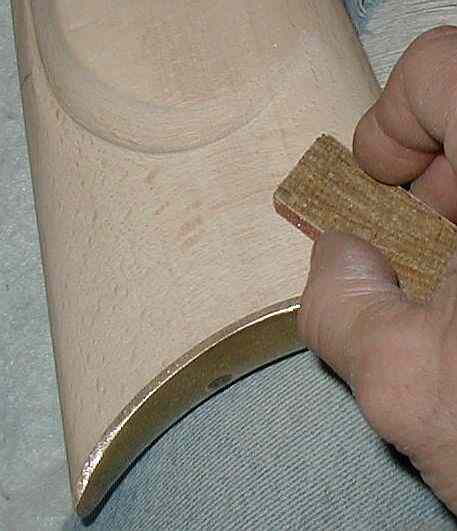
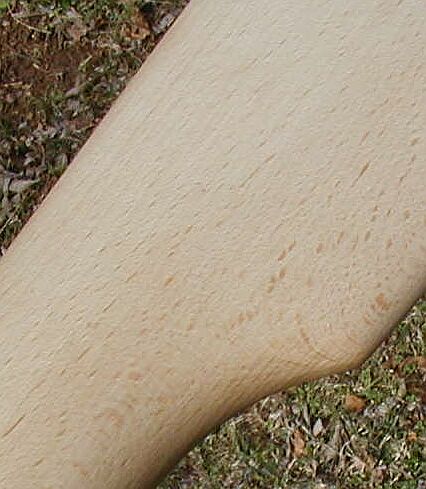
Once the shadow line is about finished high spots are sanded out of the rear of butt section. The wood is leveled from brass butt piece to shadow line. All sanding is done in the direction of grain flow. Note that sanding block is angled so as to run flush into shadow line as sanding is performed.
A sanding block with 80 and 100 grit paper is used to contour the bottom of butt section and mate it with the bottom of shadow line.
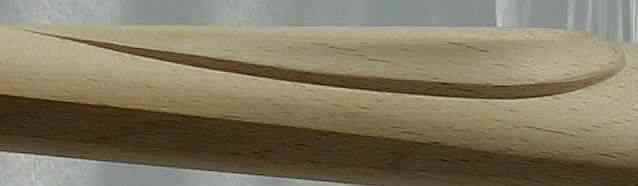
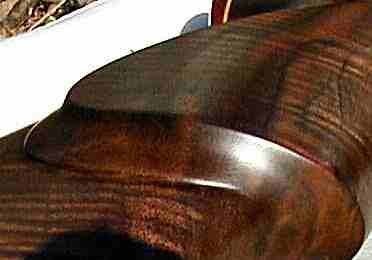
Here the shadow line is close to completion.
The curved slope from face of cheek piece to shadow line drop off is fashioned using a cigarette filter as a sanding form (block). The filter is easily shaped with finger pressure and, with some difficulty, can even be used at the extreme front and rear tapers.
Using a sanding block with 80, 100 and 120 grit paper the face of the cheek piece is dropped and contoured to preference. This also helps to sharpen the edges of the face. Great care is taken to keep the sanding block flat against face so that the edges of face do not become rounded from sanding.
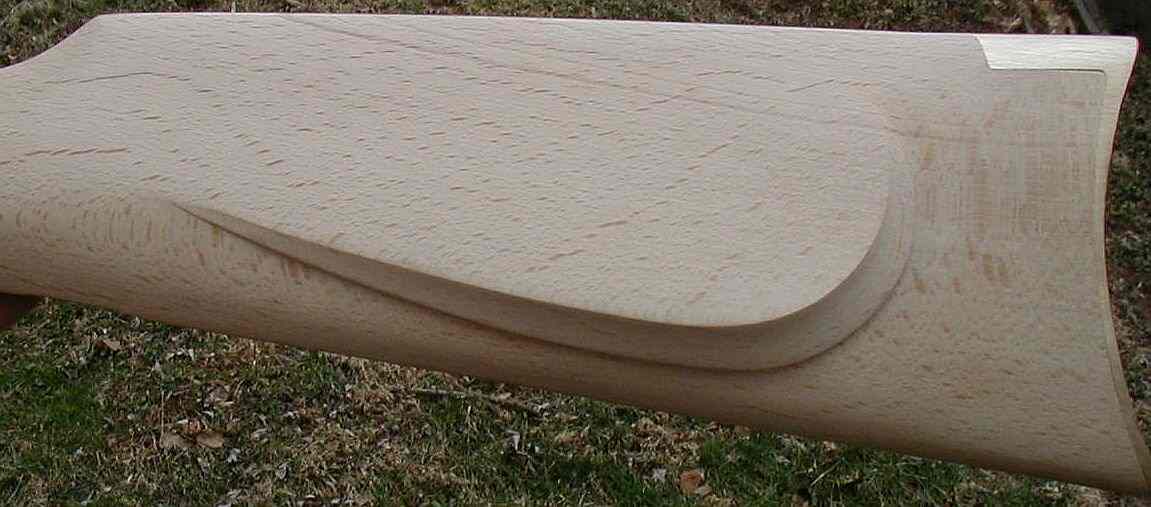

Except for final sanding and final inspection the cheek piece is complete and ready to have the flute cut into it.
Fashioning the Flutes
Like the shadow line above, flutes are not essential on the Hawken. I will add them because it enhances the rifle and because it offers an opportunity to show how I do it.
Right and left sides of front comb before cutting flutes. It may help to have a model to reference. The picture on the right shows a factory flute on a Remington model 700BDL. There are probably about as many past and present Hawken designs as there are flies to trout fish with however, in keeping with what I believe a Hawken flute might look and fit like I will attempt to point the apex of flute more toward the bottom of stock than that of the above model which, as can be seen, runs rather horizontal to center of stock.

After reviewing some pictures of Hawken percussion rifles I decided to mark with pencil approximately how the flute will lay. The actual flute may deviate some depending on how I feel it looks and fits as it is being shaped. I will use the penciled outline as a perimeter not to, at first, exceed.
Right - measuring outline to help duplicate on other side of stock.
Starting flute with 100 and 80 grit paper. Notice the handy cigarette filter as a sanding form for cutting small curves. The deepest cutting is made at the front comb drop.
The beginning of a flute.
Smoothing the contour and curving wrist area into flute. One of the few places no sanding block is used.
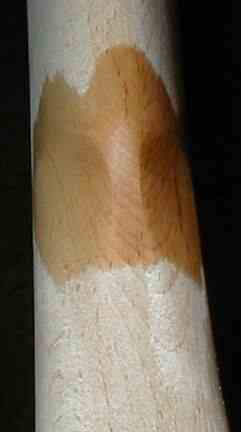
Mineral spirits was sometimes applied to highlight errors. Right - Finished after 8 coats of surface finish .
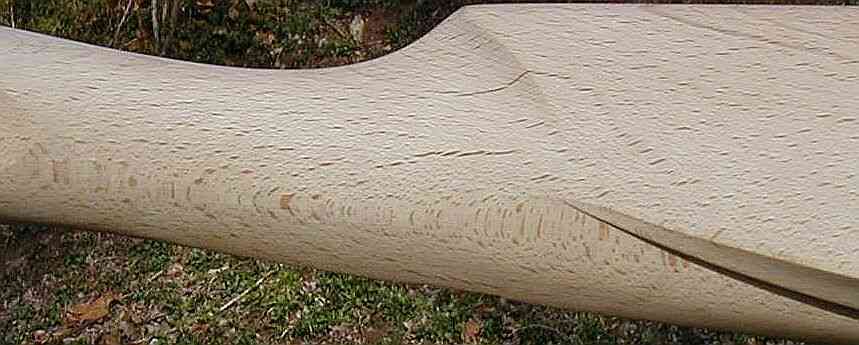
Left - Here the flute is almost fashioned. The rear curve needs to be made greater and begin closer to tip of front comb.
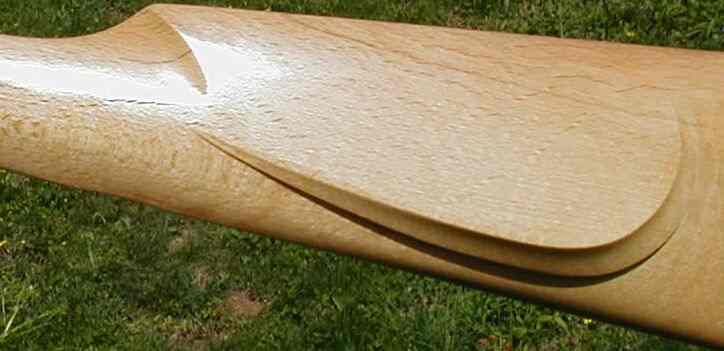
Right - Finished flute and cheekpiece after 8 coats of surface finish .
To Page Three Back To Page One
Fitting Butt Piece, Patch Box and Forend Tip
Fitting the Barrel
Fashioning the Cheek Piece
Fashioning the Flutes
Fashioning the Bottom of Butt Section and Area of Trigger Guard
Lock Inletting
Polishing the Brass Fittings
Sealing the Stock
Filling the Grain
Polishing to Wood Surface
Applying Surface Finish
The Finished Rifle
Text and graphics Copyright Riflestock.Net 2006©
Written and compiled by Roger Linger. Email: austin_long@yahoo.com